|
|
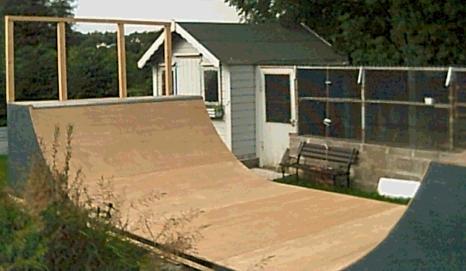
YOUR OWN STREET MINI COARSE!
I've made quite a few ramps rails and grinbox's over my time skating and have now pretty much got my own mini street coarse, so those of you who are missing woodwrx terribly keep visiting the site and I'll show you how to build your own mini street coarse step by step, every month a new obstacle!
|
heres a launch ramp to build i think you can figure out how to build it from the diagram |
|
This months project: A lowbox, with attachable ramp to come!
LOWBOX: Lowbox's are tons of fun and easy to make, this particular box's
Dimensions are: 6ft long, 2ft wide and just 10 inches high. This might seem
a little low for some of you but its just the right height for learning different
Grinds and slides without having to concentrate on the Ollie up,
First you'll have to make the frame using 3x2's you'll need 2 6ft lengths and four
1ft 8 lengths for the top, the length of the legs is up to you the higher the harder
to Ollie on to the box, I used 6 legs on this box but 4 would suffice, each of your
four legs will need two pieces of wood so its like eight legs but... not, I'll go
into this further as we get along.
|
|
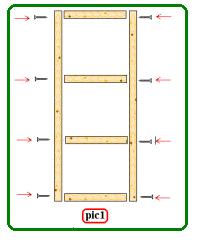
Now to assemble the parts starting with the top, use screws to hold everything
together to avoid nails popping out after continues stress, drilling guide holes
for each screw is advisable. Fist take one 6ft length and attach the 1ft 8 lengths,
Two for each end and the two in the middle evenly spaced for support, then attach
the other 6ft length to these as shown in pic1.
|
|
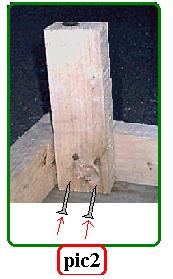
now onto the legs, I told you you would need eight pieces of wood for four legs and
this is why, now the top frame is made take your 3x2 for the leg whatever height you
want (as long as 4 are the same length) and attach them to the inside of each corner
of the top frame like in the pic2,
|
|
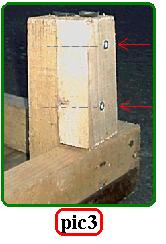
then second piece of 3x2 should go on top of the
Frame measured so you compensate for the 3 inches of thickness of the top and screwed
to the first piece as shown in pic3. Now your frame is complete.
The next step is putting on the top using a sheet of 1/2 inch ply cut to fit over the
top of your frame which should be 6x2 feet now, then screw it on, easy as pie, next
you'll need some angle-iron to fit along each 6ft side to grind on, I used two different
types, regular angle iron and wall bracket angle iron which has pre-drilled holes to use,
the important thing is to attach this from the side so you'll have no screws popping up
to put you off the grind. Now it should look something like mine and I hope you have
as much fun on yours as I do on mine!
NOTE: I advise putting some sort of rubber under each leg to maximize friction and stop the box moving, I used those rubber stoppers that go around galavanise nails.
|
|
(screws in the side of the angle-iron to save your trux getting jammed) |
|
im working on getting the plans for the mini so check the site next month to see it
|
|
|
|